Ubuntu
sudo apt-get install bsd-mailx
CentOS7
yum -y install mailx
(解决报错问题 535 Error: authentication failed, system busy)
以腾讯企业邮箱为例:
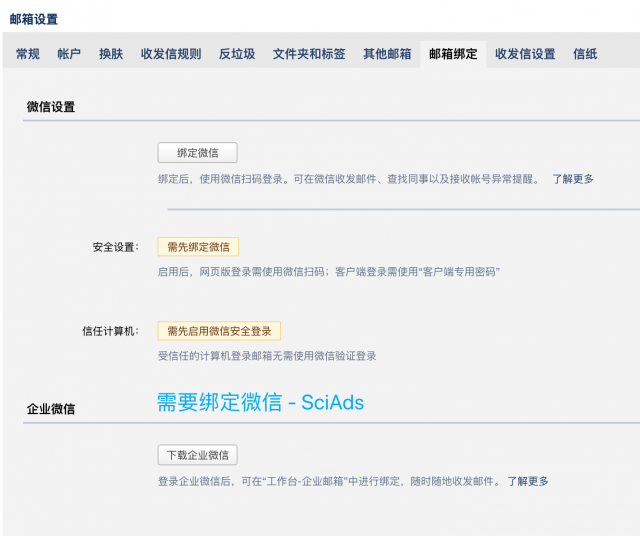
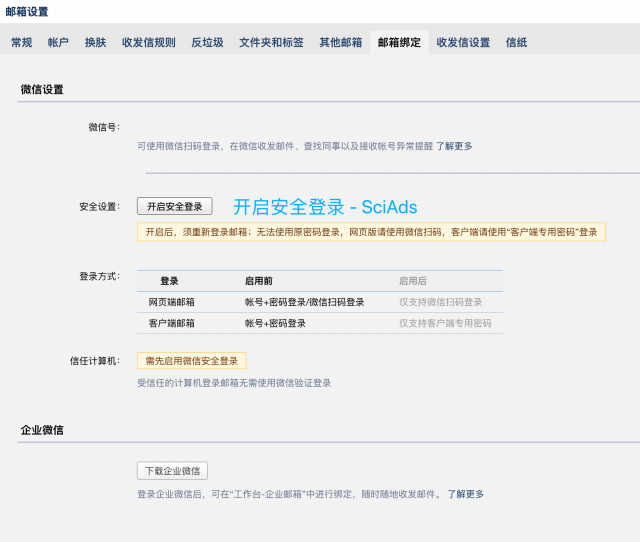
需要在邮箱【设置】-【邮箱绑定】里绑定微信,之后【开启安全登录】-【客户端专用密码】点击【生成新密码】


如果你使用的是其他邮箱,搜索后仍不明白如何获取邮箱授权码,可以在评论区留言,或联系 SciAds
set from=xxxx@qq.com               改成自己的邮箱
set smtp=smtp.qq.com               和 smtp 地址
set smtp-auth-user=xxx@qq.com
set smtp-auth-password=填入上一步生成的新密码
(如果使用的服务器的 TCP 25端口能正常连接外部地址,可跳过第四步)
由于云服务器(如阿里云、华为云等)默认封禁了 25 端口,影响通过TCP 25 端口连接第三方邮件服务商的SMTP服务器对外部发送邮件
可以申请解封端口—— 阿里云 - TCP 25端口解封申请
或通过邮箱服务器的加密端口(465)来完成发送邮件功能,以下是具体过程:
创建证书存放路径 mkdir -p /root/.certs/
获取邮件服务器证书
此处以 QQ 邮箱为例,请自行改成自己的邮箱服务器地址
echo -n | openssl s_client -connect smtp.qq.com:465 | sed -ne '/-BEGIN CERTIFICATE-/,/-END CERTIFICATE-/p' > ~/.certs/qq.crt
指明受信任证书
echo -n | openssl s_client -connect smtp.qq.com:465 | sed -ne '/-BEGIN CERTIFICATE-/,/-END CERTIFICATE-/p' > ~/.certs/qq.crt
修改配置文件 /etc/mail.rc
set from=xx@qq.com
set smtp=smtps://smtp.exmail.qq.com:465
set smtp-auth-user=xx@qq.com
set smtp-auth-password=第二步生成的授权码
set smtp-auth=login
set ssl-verify=ignore
set nss-config-dir=/root/.certs
echo "test mail" | mail -s "testing" xx@xx.com
收信邮箱能收到新邮件,就配置完成了
原文链接:https://www.cnblogs.com/lalaluna/p/linux-system-use-mailx-send-email.html
本文链接:http://task.lmcjl.com/news/13916.html